_1669694478057.jpg&w=3840&q=75)
A SIMPLE GUIDE TO BUYING REB ON KYBERSWAP
It’s official! Realbox is conducting an IDO on the KyberSwap Launchpad. This is a huge opportunity for the community to get involved in our project. Let's take a look at the simple steps below to start owing REB.
1. What's REB?
REB is the native utility token of Realbox platform and it is used to pay for service fees in the Realbox ecosystem including listing, subscription, transaction, borrowing fees and paying dividends, etc...
There are many benefits to being a REB holder, including:
- Unlimited upside potential due to high transaction fees and being a part of the profit derived.
- Opportunity to invest in real projects regardless of the token market.
- Discounts from purchasing Property Hybrid NFT
- Earn rewards within Realbox ecosystem such as discounts, free accommodation, etc…
2. How to own REB?
Realbox has officially launched IDO on KyberSwap Launchpad. You can connect your wallet on KyberSwap and start trading REB now at: https://bit.ly/3upbRfT. If users don't have a wallet yet. Here're a few steps to create and connect your wallet on KyberSwap Launchpad
2.1 Create a New Metamask Wallet
Step 1: Visit https://metamask.io/.
Step 2: Install the MetaMask browser extension.

Step 3: Click ‘Get Started’.
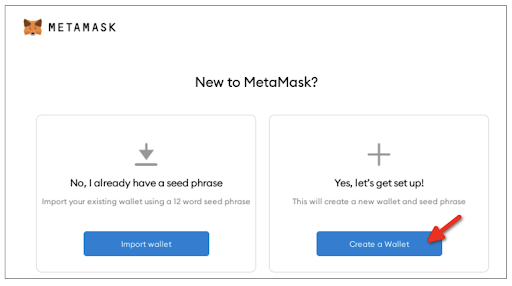
Step 4: Click ‘Create a Wallet’ if this is your first time using Metamask. You can also import another wallet using your seed phrase.
Step 5: Create your password
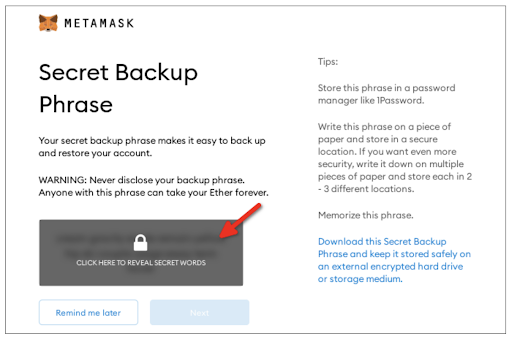
Step 6: Write down your 12-word secret backup phrase (private key) generated and store it securely. Never show anyone this as it grants access to your funds.
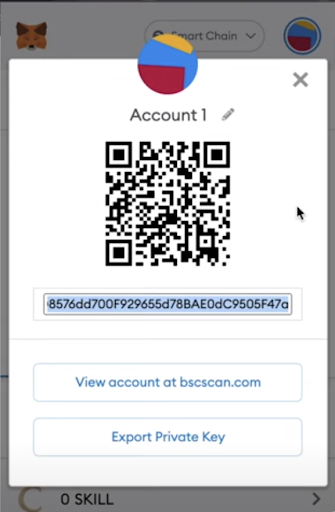
Step 7: That’s it! Your new crypto wallet has been created. If you already own some crypto, you can transfer them to your wallet address (on the correct chain). Just copy your wallet address or use the QR code and you can send it there.
Step 8: If your token is not displayed in your Metamask wallet, you can search for it on https://www.coingecko.com/en and click the Add to Metamask icon.
For example for the KNC token:
Step 9: Alternatively, if you have the full details of the token (token contract address, token symbol, token decimal), you can directly add it to your Metamask wallet. Click ‘Import Tokens’ and select the Custom Token tab, before filling in the token details. Click "Add Custom Token," and you should now see your token.
2.2 Connect your Metamask Wallet
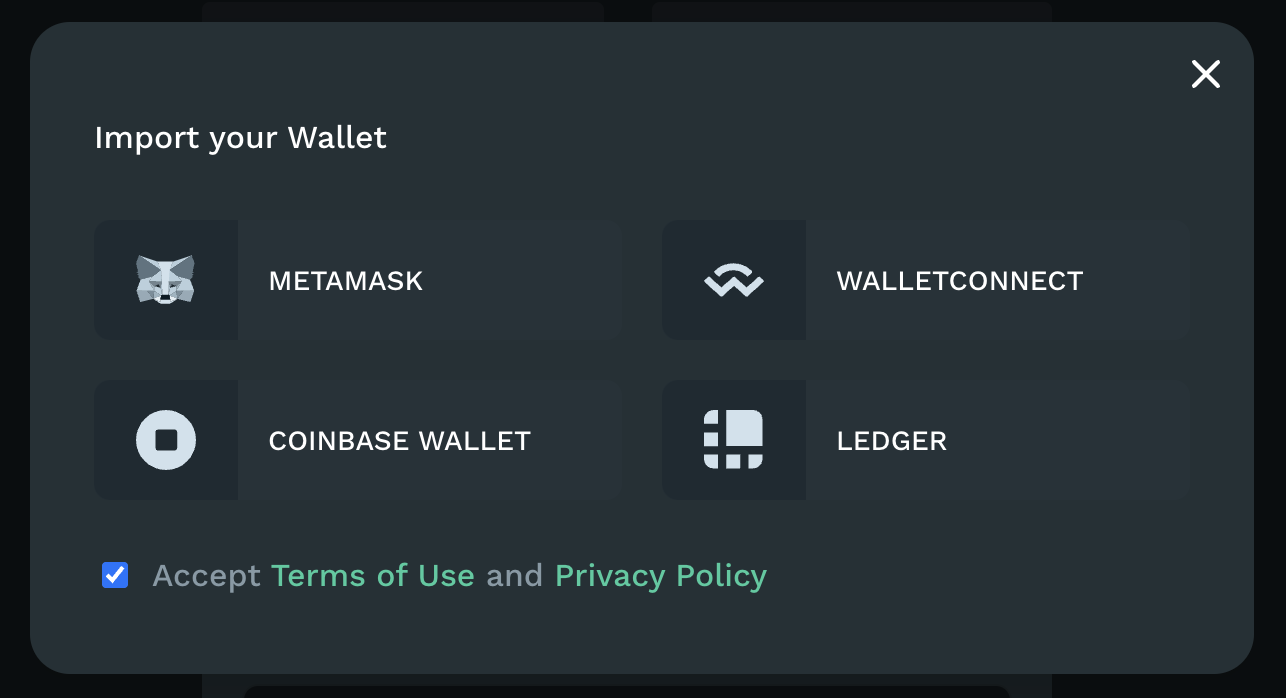
Step 1: Go to kyberswap.com and click ‘Connect Wallet’ at the top right.

Step 2: Select Metamask and connect it to Kyberswap
Step 3: You will now see your wallet address in the top right corner.
Step 4: Make sure you have some of the native blockchain tokens to pay for network transaction fees (ETH on Ethereum, MATIC on Polygon, BNB on BSC, AVAX on Avalanche, FTM in Fantom).
All transactions on a blockchain require a small fee. This fee goes to the miners (computers) that verify transactions on the blockchain and does not go to Kyberswap. For example, on Ethereum, network transaction fees are paid in Ether (ETH) so you will need ETH in your Metamask wallet. If you do not have any ETH, you must first purchase some from a centralized exchange before sending it to your Metamask wallet.
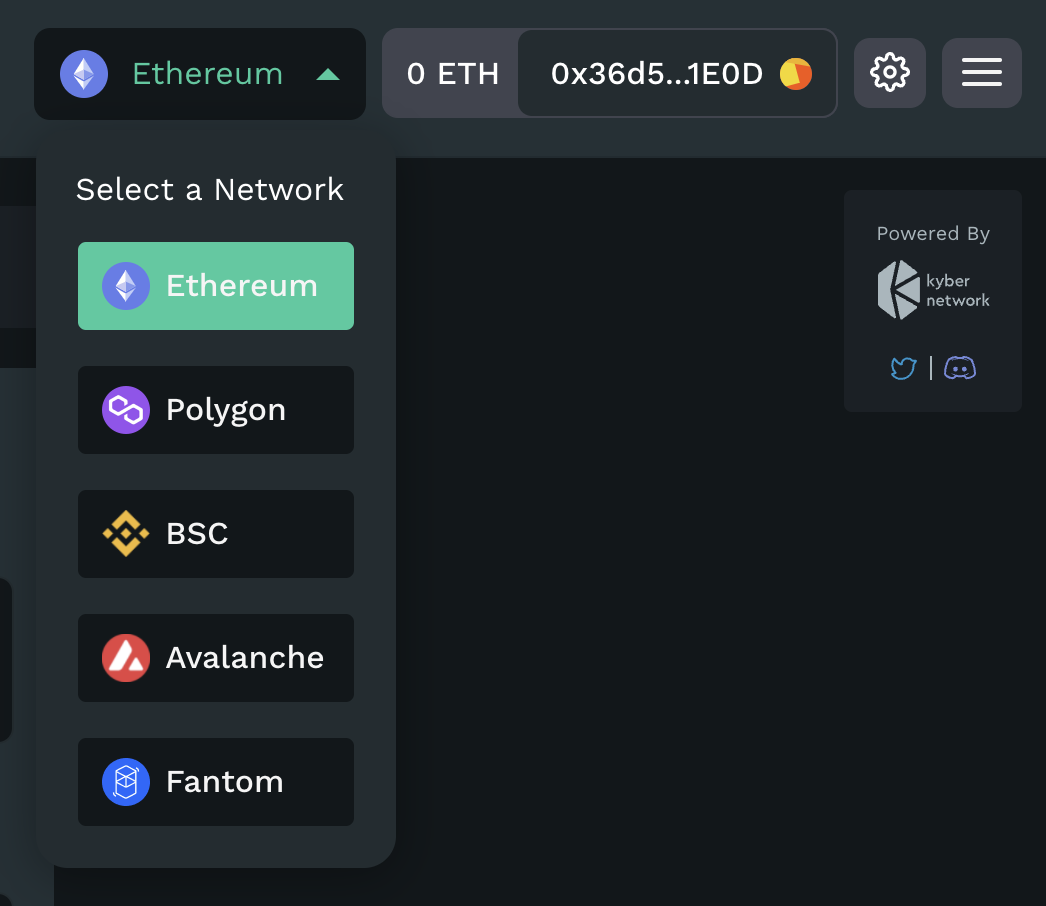
2.3 How to Switch Networks
SKyberswap is multi-chain and is currently supported on the Ethereum, Polygon, BSC, Avalanche and Fantom networks. The default network on Kyberswap is Ethereum, so to switch to another network simply click on the button labeled ‘Ethereum’ at the top next to your wallet address and a drop-down list of the supported networks will appear. Select your preferred network.
2.4 Swap Tokens
Kyberswap allows you to swap tokens easily at the best rates by aggregating liquidity from different DEXs on the network.
On centralized exchanges like Coinbase and Binance, trades are mainly done between users on the exchange itself. But on decentralized exchanges (DEXs) like Kyberswap, it is possible for you to interact and trade with smart contract-based liquidity pools that hold the tokens. These liquidity pools can be on Kyberswap or any external DEX that is integrated by Kyberswap.
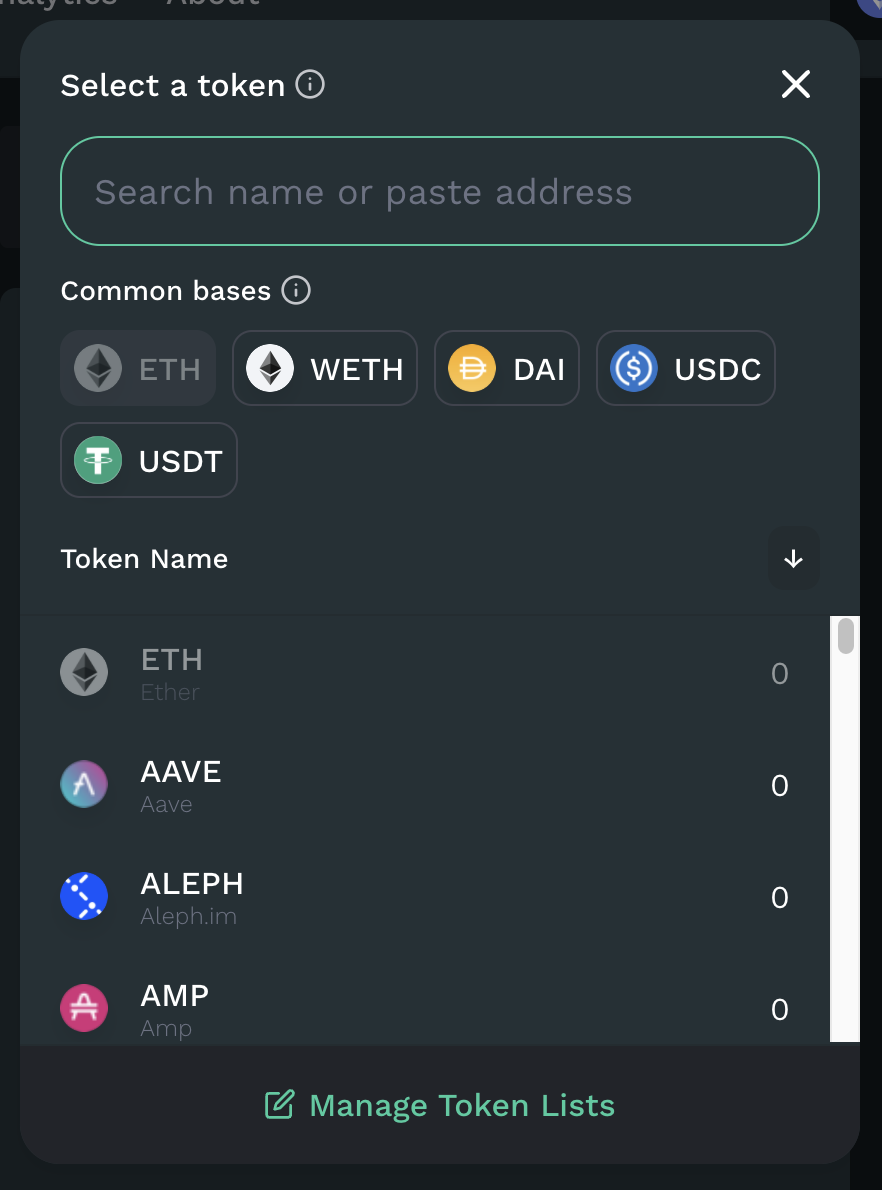
Step 1: To swap tokens, connect your wallet and go to the ‘Swap’ page on Kyberswap.

Step 2: Select which token you would like to swap from and to (e.g. From REB to USDT).
Step 3: Approve the token. When you are trying to swap a particular token for the first time, the UI will prompt you with an Approve Token transaction.
Swapping a token for the first time will need 2 transactions; one to Approve Token and the second to Swap. For every token, you will only need to Approve once. All subsequent trades for this token will require only one transaction i.e. Swap. Approval for each token has to be done separately.
Step 4: Type in the amount of tokens you wish to swap.
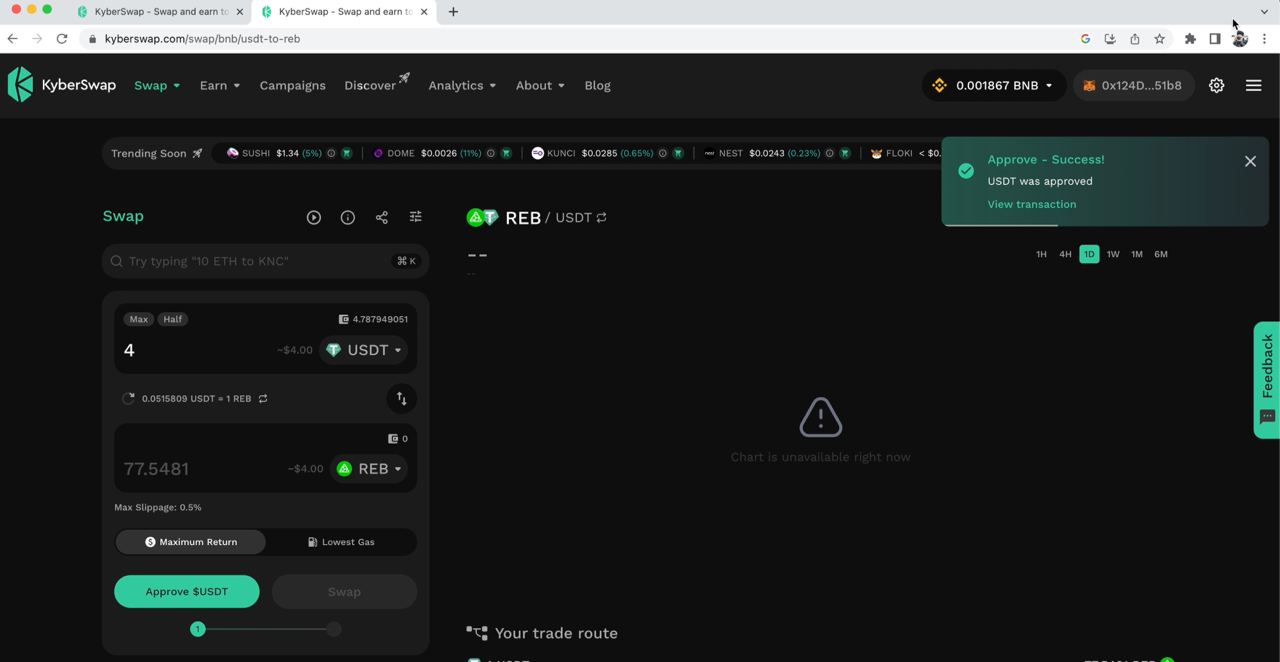
Step 5: You can view the swap's estimated output and price impact. After you have confirmed that everything is in order, click ‘Swap’ then ‘Confirm Swap’. A Metamask pop-up will appear and you have to approve the transaction.
Step 6: After the swap, if the tokens are not visible on Metamask, you may need to import a new token. You can search for it on https://www.coingecko.com/en and click the Add to Metamask icon, or import a new token directly on Metamask by filling in the required token details.
You can do the tutorials following step by step guide above or follow the video here to complete the action: https://www.youtube.com/watch?v=1cW_IhT4_dw&t=1s
Once you have connected your Metamask wallet, you can start buying REB at: https://bit.ly/3upbRfT
For quick support, please connect with Realbox's community HERE.